
The Honeywell Light Switch Timer is a programmable device designed to efficiently control lighting schedules. It offers manual and automatic modes, ensuring energy efficiency and convenience. With a sleek design, it supports various lighting types, making it a versatile solution for home automation.
Overview of Honeywell Light Switch Timer
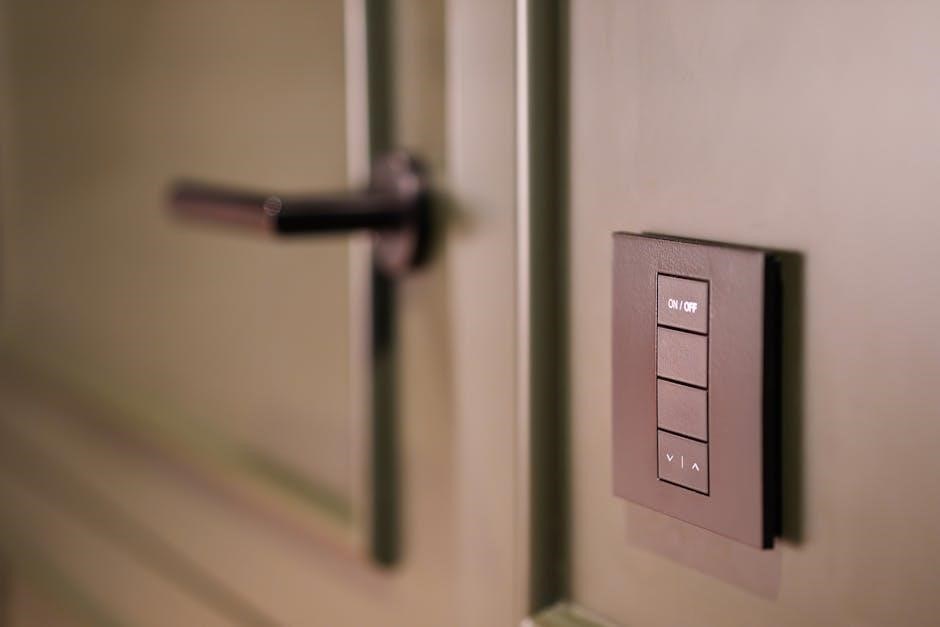
The Honeywell Light Switch Timer is a programmable device designed to control lighting schedules efficiently. It features a 7-day solar programmable function, allowing users to set custom on/off times for their lights. The timer supports both manual and automatic modes, providing flexibility in operation. Compatible with various light types, including LED, incandescent, and halogen, it ensures universal applicability. The sleek, white design integrates seamlessly with wall plates, offering a modern look. With universal wiring for single-pole or 3-way installations, it simplifies setup. The timer also includes a manual override feature, enabling quick changes without affecting programmed schedules. Its energy-efficient design helps reduce power consumption, making it a practical and convenient solution for home automation.

Importance of Following Instructions
Adhering to the Honeywell Light Switch Timer instructions is crucial for proper installation and operation. Failure to follow guidelines may result in electric shock, device malfunction, or fire hazards. Cutting power at the circuit breaker before installation is essential to ensure safety. Incorrect wiring connections can lead to faulty performance or damage to the timer. Programming without setting the correct time and date may render schedules ineffective. Manual and automatic modes must be understood to avoid unintended light operations. Proper setup ensures energy efficiency and security features function as intended. Always refer to the official user manual for specific models like RPLS540A or RPLS741B to guarantee compatibility and optimal use of advanced features like random mode for added security.

Preparation for Installation
Preparation involves cutting power at the circuit breaker, identifying wires, and setting the time and date before installation. This ensures safety and proper functionality.
Setting the Time and Date
Setting the time and date is essential for proper timer functionality. The device defaults to a 24-hour format but can be switched to 12-hour by pressing the MIN and HOUR buttons simultaneously. After selecting the format, use the HOUR and MIN buttons to set the current time. If using 12-hour format, ensure AM/PM is displayed correctly. Next, use the DAY button to set the current day. Verify the time and date are accurate to ensure schedules work correctly. This step is crucial before programming custom schedules, as all timers rely on the correct time and date for operation. Always complete this step before proceeding with installation or programming.
Understanding Manual and Automatic Modes
The Honeywell Light Switch Timer operates in two primary modes: Manual and Automatic. In Manual mode, the switch functions like a regular light switch, allowing you to turn lights on or off momentarily. This mode is indicated by a specific icon on the LCD screen. In Automatic mode, the timer follows a programmed schedule, switching lights on or off at predetermined times. Additionally, some models feature a Random mode, enhancing security by simulating occupancy. Switching between modes is straightforward, offering flexibility for different situations. Understanding these modes ensures optimal use of the timer’s features. Always refer to the menu flowchart for seamless navigation between modes. This feature provides convenience and security for your lighting needs.
The Honeywell Light Switch Timer is designed to be compatible with a wide range of lighting options. It works seamlessly with incandescent and halogen bulbs, ensuring smooth operation and energy efficiency. Additionally, certain models are compatible with LED and CFL bulbs, making it a versatile choice for modern homes. However, it’s important to note that some models may not support low-voltage halogen systems without a transformer. Always check the product specifications to ensure compatibility with your specific lighting setup. This universal design allows homeowners to integrate the timer into various lighting configurations without compromising performance. Proper compatibility ensures reliable operation and extends the life of both the timer and the lighting fixtures. This feature makes the Honeywell timer a practical solution for diverse household needs. The installation involves cutting power, then removing the old switch. For single-pole setups, connect wires to the timer. In 3-way installations, identify and label the common wire. Ensure proper connections and test the timer after installation to confirm functionality. Always follow safety guidelines to avoid electric shock. This process ensures a smooth and secure setup for optimal performance. Proper installation is key to enjoying the timer’s features. Take your time to ensure all wires are correctly connected for reliable operation. This step is crucial for the timer to function as intended. Always refer to the manual for specific instructions tailored to your setup. Safety first to avoid any electrical hazards during the process. Ensure the area is well-lit and tools are ready. This ensures a successful installation experience. Follow each step carefully to achieve the desired results. The process is designed to be straightforward for DIY enthusiasts. With attention to detail, you can complete the installation efficiently. The timer will then be ready to program and use, providing convenience and energy savings. Make sure to test all functions after installation to ensure everything works correctly. This final check ensures peace of mind and proper operation. The installation process is a critical step in integrating the timer into your home automation system. By following the instructions, you can enjoy the benefits of programmable lighting control. This process lays the foundation for the timer’s functionality and performance. Take the time to do it right for long-term reliability; Proper installation ensures the timer operates smoothly and efficiently. This step is essential for maximizing the timer’s potential. With careful installation, you can enjoy the convenience of programmed lighting schedules. The process may seem complex, but with patience, it can be completed successfully. Always prioritize safety and accuracy during installation. The end result will be a fully functional timer that meets your needs. Following the installation guide ensures a trouble-free experience. This process is a key part of setting up your Honeywell Light Switch Timer. By completing it correctly, you can move on to programming and enjoying the timer’s features. The installation process is the first step toward enhancing your home’s lighting system. It is important to approach it methodically for the best results. With the timer installed, you can proceed to set up your preferred lighting schedules. This process is the foundation of your timer’s functionality and performance. It is essential to complete it accurately for optimal results. The installation process is designed to be user-friendly, allowing homeowners to set up the timer with ease. By following the steps, you can ensure a successful installation. This process is crucial for the timer to function correctly and provide the desired benefits. Take the time to complete it properly for a seamless experience. The installation process is a vital part of integrating the Honeywell Light Switch Timer into your home. It ensures the timer works as intended, offering convenience and energy efficiency. By following the instructions, you can complete the installation and start enjoying the timer’s features. This process is the starting point for programmable lighting control in your home. It is important to approach it with care for long-term reliability. The installation process is straightforward, allowing you to set up the timer without professional assistance. With careful attention to detail, you can complete it successfully. This process ensures the timer is properly integrated into your home’s electrical system. It is a critical step in achieving the full potential of the Honeywell Light Switch Timer. By completing the installation correctly, you can enjoy the benefits of programmable lighting. The process is designed to be manageable for homeowners, providing a smooth transition to automated lighting control. It is essential to follow the instructions carefully for a successful installation. This process is the first step in enhancing your home with the Honeywell Light Switch Timer. It ensures the timer is ready for programming and use, offering convenience and energy savings. By completing the installation process, you can move forward with setting up your lighting schedules. This process is vital for the timer to function correctly and provide the desired benefits. It is important to approach it methodically for optimal results. The installation process is a key part of setting up your Honeywell Light Switch Timer. It ensures the timer is properly installed and ready for use, offering reliable performance. By following the instructions, you can complete the installation and start enjoying the timer’s features. This process is the foundation of your timer’s functionality and performance. It is essential to complete it accurately for long-term reliability. The installation process is designed to be user-friendly, allowing homeowners to set up the timer with ease. By following the steps, you can ensure a successful installation. This process is crucial for the timer to function correctly and provide the desired benefits. Take the time to complete it properly for a seamless experience. The installation process is a vital part of integrating the Honeywell Light Switch Timer into your home. It ensures the timer works as intended, offering convenience and energy efficiency. By following the instructions, you can complete the installation and start enjoying the timer’s features. This process is the starting point for programmable lighting control in your home. It is important to approach it with care for long-term reliability. The installation process is straightforward, allowing you to set up the timer without professional assistance. With careful attention to detail, you can complete it successfully. This process ensures the timer is properly integrated into your home’s electrical system. It is a critical step in achieving the full potential of the Honeywell Light Switch Timer. By completing the installation correctly, you can enjoy the benefits of programmable lighting. The process is designed to be manageable for homeowners, providing a smooth transition to automated lighting control. It is essential to follow the instructions carefully for a successful installation. This process is the first step in enhancing your home with the Honeywell Light Switch Timer. It ensures the timer is ready for programming and use, offering convenience and energy savings. By completing the installation process, you can move forward with setting up your lighting schedules. This process is vital for the timer to function correctly and provide the desired benefits. It is important to approach it methodically for optimal results. The installation process is a key part of setting up your Honeywell Light Switch Timer. It ensures the timer is properly installed and ready for use, offering reliable performance. By following the instructions, you can complete the installation and start enjoying the timer’s features. This process is the foundation of your timer’s functionality and performance. It is essential to complete it accurately for long-term reliability. The installation process is designed to be user-friendly, allowing homeowners to set up the timer with ease. By following the steps, you can ensure a successful installation. This process is crucial for the timer to function correctly and provide the desired benefits. Take the time to complete it properly for a seamless experience. The installation process is a vital part of integrating the Honeywell Light Switch Timer into your home. It ensures the timer works as intended, offering convenience and energy efficiency. By following the instructions, you can complete the installation and start enjoying the timer’s features. This process is the starting point for programmable lighting control in your home. It is important to approach it with care for long-term reliability. The installation process is straightforward, allowing you to set up the timer without professional assistance. With careful attention to detail, you can complete it successfully. This process ensures the timer is properly integrated into your home’s electrical system. It is a critical step in achieving the full potential of the Honeywell Light Switch Timer. By completing the installation correctly, you can enjoy the benefits of programmable lighting. The process is designed to be manageable for homeowners, providing a smooth transition to automated lighting control. It is essential to follow the instructions carefully for a successful installation. This process is the first step in enhancing your home with the Honeywell Light Switch Timer. It ensures the timer is ready for programming and use, offering convenience and energy savings. By completing the installation process, you can move forward with setting up your lighting schedules. This process is vital for the timer to function correctly and provide the desired benefits. It is important to approach it methodically for optimal results. The installation process is a key part of setting up your Honeywell Light Switch Timer. It ensures the timer is properly installed and ready for use, offering reliable performance. By following the instructions, you can complete the installation and start enjoying the timer’s features. This process is the foundation of your timer’s functionality and performance. It is essential to complete it accurately for long-term reliability. The installation process is designed to be user-friendly, allowing homeowners to set up the timer with ease. By following the steps, you can ensure a successful installation. This process is crucial for the timer to function correctly and provide the desired benefits. Take the time to complete it properly for a seamless experience. The installation process is a vital part of integrating the Honeywell Light Switch Timer into your home. It ensures the timer works as intended, offering convenience and energy efficiency. By following the instructions, you can complete the installation and start enjoying the Start by turning off the power at the circuit breaker. Remove the old switch, taking care not to damage the wires. Identify the line (incoming power) and load (outgoing to light) wires. Connect the line wire to terminal C and the load wire to terminal 2 on the Honeywell timer. Secure the wires tightly to ensure proper connections. Mount the timer to the wall plate, ensuring it sits flush. Restore power and test the timer by toggling between Manual and Automatic modes. Finally, program the timer with your desired schedule. This process ensures a safe and functional single-pole installation, allowing you to control your lights efficiently. Always follow safety guidelines to avoid electrical hazards. For a 3-way installation, identify the common wire from the old switch and label it. Connect this common wire to terminal C on the Honeywell timer. Attach the remaining two wires to terminals 1 and 2. At the second 3-way switch, connect a jumper wire between the common screw and the terminal where wire 1 of the timer is connected. Ensure all connections are secure and not loose. Mount the timer and restore power. Test the functionality by switching between Manual and Automatic modes. This setup allows control of the same light fixture from multiple locations, enhancing convenience and flexibility in your home automation system. Always refer to the manual for specific wiring diagrams to avoid errors. Proper installation ensures safe and reliable operation of the timer. Start by identifying the common wire from the old switch and label it. Connect this common wire to terminal C on the Honeywell timer. Attach the remaining two wires to terminals 1 and 2. At the second 3-way switch, connect a jumper wire between the common screw and the terminal where wire 1 of the timer is connected. Ensure all connections are secure and not loose. Mount the timer and restore power. Test the functionality by switching between Manual and Automatic modes. Proper wiring ensures safe and reliable operation, allowing control of the light fixture from multiple locations. Always refer to the manual for specific wiring diagrams to avoid errors. Correct connections are essential for optimal performance and safety. Before starting, cut power at the circuit breaker to avoid electric shock. Verify the power is off using a voltage tester. Remove the existing switch and label the wires for easy identification. Avoid touching bare wires to prevent electrical contact. Ensure all connections are secure and not loose. If working with a 3-way installation, carefully handle the jumper wire to maintain proper circuit functionality. Always follow the manufacturer’s guidelines for wire connections. After installation, test the timer by turning the power back on and checking its operation. Keep the area clear of flammable materials and ensure the switch is mounted securely. Safety precautions are crucial to prevent accidents and ensure reliable performance of the Honeywell Light Switch Timer. Set the time and date before programming. Use the menu flowchart to navigate settings. In manual mode, press the main button to control lights. For automatic mode, program custom schedules using the HOUR, MIN, and DAY buttons. Save your settings to ensure the timer operates as intended. Refer to the menu flowchart for detailed guidance on activating and adjusting programs. Start by setting the correct time and date on the timer. Use the HOUR and MIN buttons to adjust the time, and the DAY button to set the current day. Navigate through the menu using the provided flowchart to access programming options. Select the desired program (e.g., P1, P2) by pressing the PGM button. Use the HOUR and MIN buttons to set the ON and OFF times for each program. Ensure the switch is in AUTO mode to enable scheduled operation. Save your settings by pressing and holding the PGM button until confirmation appears. Refer to the menu flowchart for additional guidance on advanced settings and custom schedules. Always test your settings to confirm proper operation. To create a custom schedule, press the PGM button to select the desired program (e.g., P1, P2, P3, or P4). Use the HOUR and MIN buttons to set the ON and OFF times for each program. Choose the days of the week when the program should run by cycling through the day options. For instance, press the DAY button to select Monday, Tuesday, or “ALL” days. Once the schedule is set, press and hold the PGM button to save your settings. The timer will now automatically control your lights according to the programmed schedule. You can create up to four custom programs, tailoring your lighting to your daily routine or specific needs. The menu flowchart is a visual guide that simplifies navigation through the timer’s settings. Start by pressing the PGM button to access programming mode. Use the DAY, HOUR, and MIN buttons to adjust the schedule. The flowchart helps ensure all settings are configured correctly, from selecting the program number to setting the ON and OFF times. It also illustrates how to assign specific days for each program. By following the flowchart, you can avoid missing steps and ensure your custom schedules are accurately programmed. This tool is especially useful for troubleshooting, as it provides a clear path to resolve common issues like incorrect time formats or program assignments. Press the main button to switch between manual and automatic modes. Use the PGM button to program schedules and the DAY, HOUR, and MIN buttons to set times. The LCD screen displays the current status. The Manual Override Function allows users to turn lights on or off without altering the programmed schedule. To activate, briefly press the main button. The timer will display the override status, ensuring convenience and flexibility. This feature is ideal for temporary adjustments while maintaining programmed settings. The switch returns to its scheduled operations once the override is deactivated. The Honeywell Light Switch Timer offers seamless mode switching between Manual, Automatic, and Random modes. In Manual mode, the switch operates like a traditional light switch, allowing on/off control. The Automatic mode follows a programmed schedule, while Random mode enhances security by varying the schedule. To switch modes, use the menu flowchart to navigate and select the desired mode. The LCD display will confirm the active mode. This feature ensures flexibility and customization, making it easy to adapt the timer to different scenarios. The ability to switch modes effortlessly provides convenience and energy efficiency, catering to various user preferences and needs. Ensure the ON/OFF selector is properly set for smooth transitions. The Honeywell Light Switch Timer features an intuitive LCD screen that displays essential information, including the current time, day, and load status. The screen shows whether the switch is in Manual or Automatic mode, providing clarity for operation. By default, the timer displays time in 24-hour format, but it can be switched to 12-hour format if preferred. The LCD also indicates the ON/OFF times for programmed schedules, making it easy to monitor and adjust settings. This display ensures users can quickly understand the switch’s status and make necessary adjustments, offering convenience and ease of use for daily operation. The clear visual feedback enhances the overall functionality of the timer. Common issues include resetting the switch, checking wire connections, and resolving display format problems. Ensure the switch is properly installed and powered for optimal functionality and performance. Resetting the Honeywell Light Switch Timer is essential if it malfunctions or needs reconfiguration. To reset, use a paper clip to press the small reset pinhole on the switch. This action will restore default settings while preserving custom schedules. Ensure the ON/OFF selector is set to the correct position before resetting. After resetting, the timer will require reprogramming. Always power down the switch at the circuit breaker before performing a reset to avoid electrical issues. This step ensures the device operates correctly and maintains optimal performance. Proper resetting is key to resolving most operational issues without affecting existing programmed settings. Ensure all wires are securely connected to the correct terminals on the Honeywell Light Switch Timer. Always cut power at the circuit breaker before inspecting or adjusting connections. Identify the common wire and line wires, ensuring they are properly linked. For 3-way installations, verify the jumper wire is correctly placed between screws. The white wire is not neutral but connects to the load. Double-check that wires 2 and C are attached to the line and common terminals, respectively. Secure all connections to prevent loose wires, which can cause malfunctions. Proper wiring is crucial for reliable operation. Refer to the manual for specific terminal assignments and troubleshooting guidance to ensure safe and accurate installation. If the display format is incorrect, reset the timer by pressing the MIN and HOUR buttons simultaneously. This resets the time to 12-hour format. To switch between 12-hour and 24-hour formats, press and hold the same buttons briefly. Ensure the time and day are set correctly after resetting. If issues persist, refer to the menu flowchart for navigation guidance. The default display is 24-hour format, but switching is straightforward. Always ensure the timer is set to the correct mode (MAN or AUTO) before adjusting formats. Proper display settings ensure accurate scheduling and operation. Consult the user manual for detailed steps if format issues recur. This ensures optimal functionality and user experience. Enhance your home with the Honeywell Light Switch Timer’s security and convenience. It offers energy efficiency, universal design, and supports various light types for seamless integration and optimal performance. The Honeywell Light Switch Timer promotes energy efficiency by allowing users to schedule lighting usage precisely. This reduces unnecessary energy consumption when lights are not needed. By automating your lighting system, you can lower your electricity bills and extend the lifespan of your bulbs. Additionally, the timer’s ability to turn lights on and off automatically mimics occupancy, enhancing security while saving energy. Its compatibility with LED and CF bulbs further supports eco-friendly lighting solutions. Overall, this device is a practical investment for homeowners seeking to reduce energy waste and optimize their lighting systems. The Honeywell Light Switch Timer enhances both security and convenience for homeowners. Its programmable scheduling allows lights to turn on and off automatically, creating the illusion of occupancy, which can deter intruders. The random mode adds an extra layer of security by varying the timing of light activation. For convenience, users can easily program custom schedules, ensuring lights operate according to their lifestyle. The timer also features a manual override, enabling quick adjustments without disrupting programmed settings. Its compatibility with various light types, including LED and halogen bulbs, ensures seamless integration into any home. These features make the Honeywell Light Switch Timer a practical solution for modern living, combining security and ease of use. The Honeywell Light Switch Timer is designed with universal compatibility in mind, ensuring it works seamlessly with various lighting systems. It supports both single-pole and 3-way installations, making it adaptable to different home configurations. The timer is compatible with incandescent, halogen, and LED bulbs, offering flexibility for different lighting needs. Its sleek, flush-mount design complements any wall plate, enhancing home aesthetics. Additionally, the timer’s universal wiring system simplifies installation, while its intuitive interface ensures easy programming. This versatility makes the Honeywell Light Switch Timer a reliable choice for homeowners seeking a modern, efficient lighting control solution that integrates effortlessly into their existing electrical setup. The Honeywell Light Switch Timer is an excellent addition for energy efficiency and convenience, offering improved control over lighting schedules while enhancing home security and comfort. For optimal performance, ensure the timer is set to the correct time and date. Regularly check wire connections to prevent malfunctions. Use the manual override sparingly to avoid disrupting programmed schedules. Always switch to the OFF position before replacing bulbs. When troubleshooting, reset the timer using a paper clip. Refer to the menu flowchart for navigating settings efficiently. Ensure all lights are compatible with the timer to avoid damage. By following these tips, you can maximize energy savings and enjoy seamless control over your lighting system. For additional guidance, visit Honeywell’s official website or refer to the provided user manuals. Detailed installation and programming instructions are available at ManualsLib. You can also explore the Honeywell Home support page for troubleshooting tips and FAQs. Videos on YouTube offer visual step-by-step tutorials. For specific models like the RPLS740B or RPLS540A, consult their respective PDF guides. Remember to check compatibility with your lighting type before installation. These resources ensure you make the most of your Honeywell Light Switch Timer.Compatibility with Different Light Types

Installation Process
Single-Pole Installation Steps
3-Way Installation Steps
Connecting Wires Properly
Ensuring Safety During Installation
Programming the Timer
Basic Programming Steps
Setting Custom Schedules
Using the Menu Flowchart
Operating the Timer
Manual Override Function
Switching Between Modes
Understanding the LCD Screen Display

Troubleshooting Common Issues

Resetting the Switch

Checking Wire Connections
Resolving Display Format Issues

Additional Features
Energy Efficiency Benefits
Security and Convenience
Universal Design Compatibility
Final Tips for Optimal Use

Where to Find More Resources